On this post, i am going to show you how to install a single instance Oracle Database 11g release 2 with ASM using Oracle Enterprise Linux 6 x86_64 and role separation.
In order to setup the environment you will need:
- The Oracle Database 11g Software (11.2.0.3). LINK
- The Oracle Grid Infrastructure 11g Software (11.2.0.3). LINK
- The Oracle Linux 6.3 x86_64 installation CD/ISO. LINK
- A Virtual Machine/ Server with x86_64 support
Note: You will need your OTN login in order to download the products. If you don’t have one, go ahead and register.
I am going to use Oracle Virtual Box to setup the lab. Here are the details for the VM.
- Name: oralab1
- RAM: 3.5 GB
- Hostname: oralab1.localdomain
- Ip: 192.168.10.151/255.255.255.0 gw 192.168.10.1
- Nics: 1 bridged adapter
- Disks: 1 * 54 GB, 3 * 9 GB
We are going to make the installation in the following order.
- Installing and configuring the Operating system.
- Installing Oracle Grid Infrastructure and ASM.
- Installing the Database Software and creating the Database.
Let’s Begin
PART I – Installing and configuring Oracle Enterprise Linux 6 x86_64
Once you create your VM/Server and downloaded your Linux media, boot your VM/Server to begin the installation.

Once the anaconda installer loads up, click next to begin

Select your preferred language and keyboard


Select your type for storage and continue


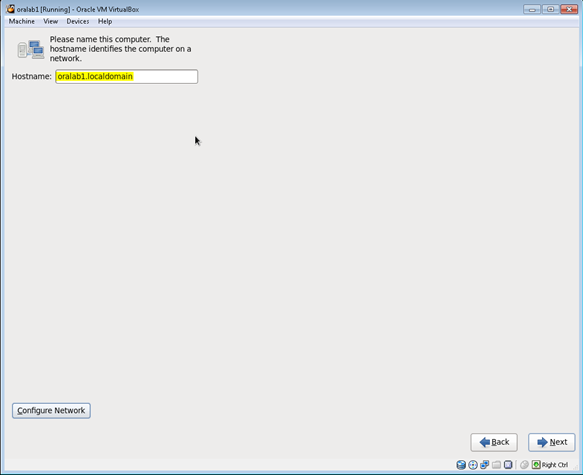
Setup your hostname and network interfaces and continue
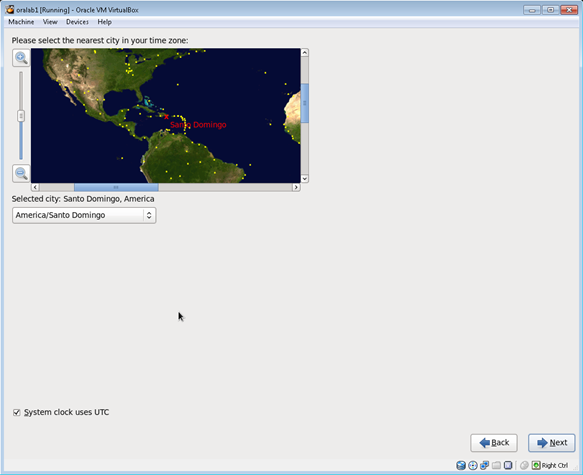
Choose your time zone
Choose your root password

Select your type of installation and continue.

Next you will be prompted to choose which type of server installation you want. Here I prefer to select a custom installation to select only the packages that i need.

In the next screen select all the required packages that you need, at least include:
- Desktop Environment
- X Server
- Administration tools
- Oracle 11g Preinstall package and the AsmLib driver

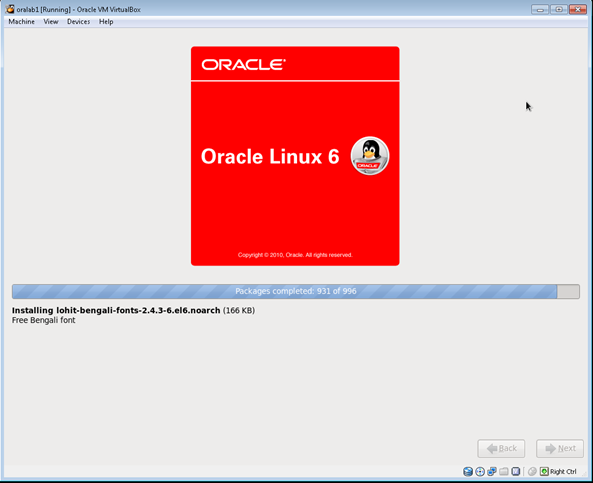
Once you’re done with the packages, click next to begin the installation


Click reboot to finish

When the operating system reboots, you will need to complete the setup as follows


You could create the grid user here. I prefer to do it later, click Forward to continue

Select your time to continue

Click Finnish

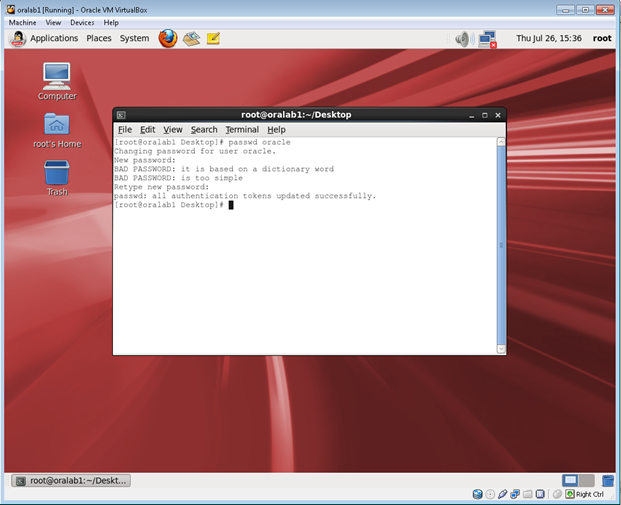
Now you will need to login using the root user. This is because the oracle user created by the Oracle Preinstall package does not have password. Log on and set it up

Disable the firewall. Go go System/Administration/Firewall

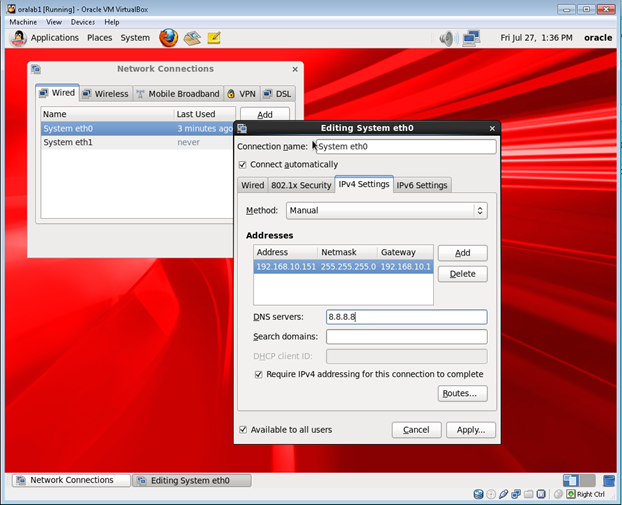
Depending on your environment edit your network interface as follows.

Edit your hosts file hosts file with your hostname and ip.

Reload your network as follows

Install your virtual box guest additions. This will not be necessary if you’re on a physical server or VmWare.

Create the necessary directories and the grid user.
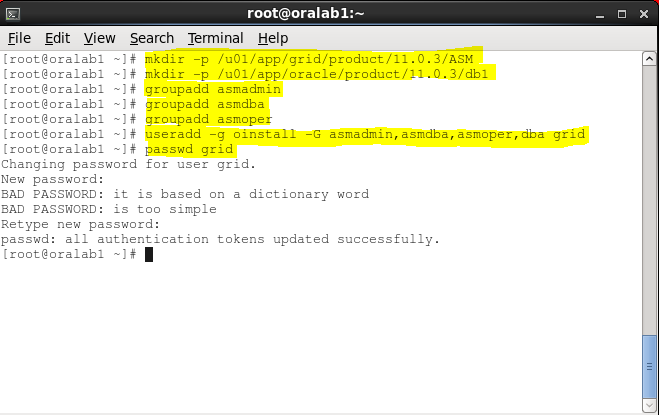
Set the necessary permissions

Edit the file ‘/home/grid/.bash_profile’ and add the following lines to set up the grid user environment

Edit the file ‘/home/oracle/.bash_profile’ and add the following lines to set up the oracle user environment

Shutdown your system and add the necessary disks to be used as ASM disks. In this case I’ll created 3 disks

Startup you system and configure you ASM driver as the root user

Check if your disks are available

It’s time to setup the disks. As you saw in the previous screenshot, i have three additional disks named (/dev/sdb, /dev/sdc, /dev/sdd ) we need to partition each disks in order to make them available for ASM. We will use fdisk to partition them, here is the order you’ll have to follow.
- fdisk /dev/sdb
- n,p,1,1,w
- fdisk /dev/sdc
- n,p,1,1,w
- fdisk /dev/sdd
- n,p,1,1,w
Here is how it looks like:

Let’s check again our disks. You will notice that 3 more devices appear, those are the partition we created.

Next let’s disable SELinux as follows ‘vi /etc/selinux/config’

Create your ASM disks as follows
oracleam createdisk ‘DISK1’ /dev/sdb1
oracleam createdisk ‘DISK2’ /dev/sdc1
oracleam createdisk ‘DISK3’ /dev/sdd1

At this point we will have our server ready for the grid infrastructure installation.
PART II – Installing Oracle Grid Infrastructure 11.2.0.3 and ASM
In this installation we will use role separation of duties; we will proceed as the grid user who’s going to be the GRID_HOME owner
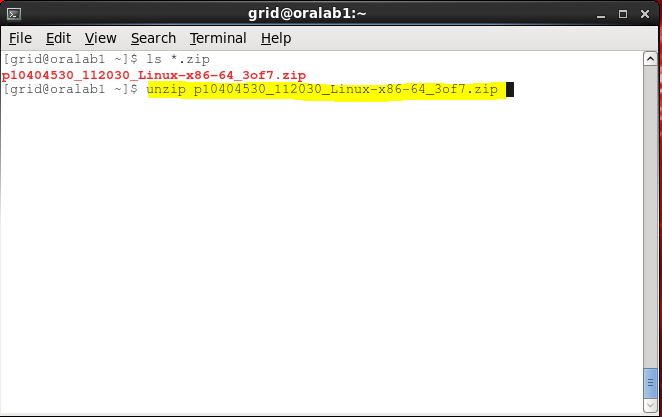
If you have downloaded all the files required, unzip the file p10404530_112030_Linux-x86-64_3of7.zip as follows
After unzipping the file, you will have a folder called “grid”. Start the installer with ./runInstaler

Skip the software updates

Select the option for a standalone server as shown in the picture

Select you languages

Create one diskgroup called DATA with disks ( DISK1, DISK2 ) with external redundancy a shown.

Specify a password for sys and asmsnmp accounts

Leave the default groups and continue

Choose the paths to de ORACLE_BASE and ORACLE_HOME
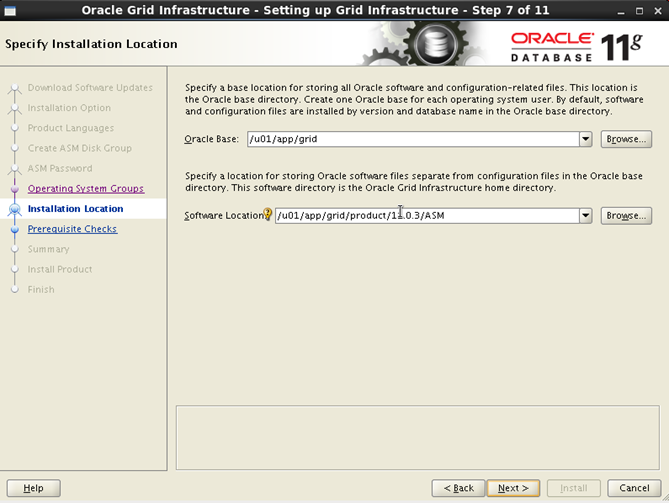
Note: 11.0.3 in the path, should be 11.2.3 if you follow OFA or you can choose whatever you want in your ORACLE_HOME path
Specify for inventory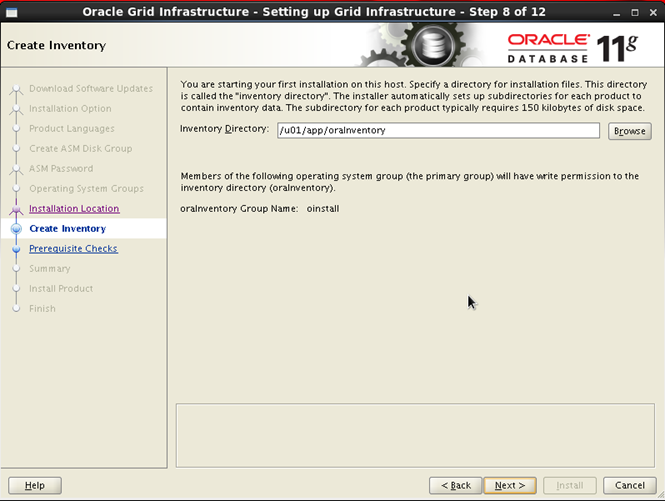
Next the installer will perform a check on your server as shown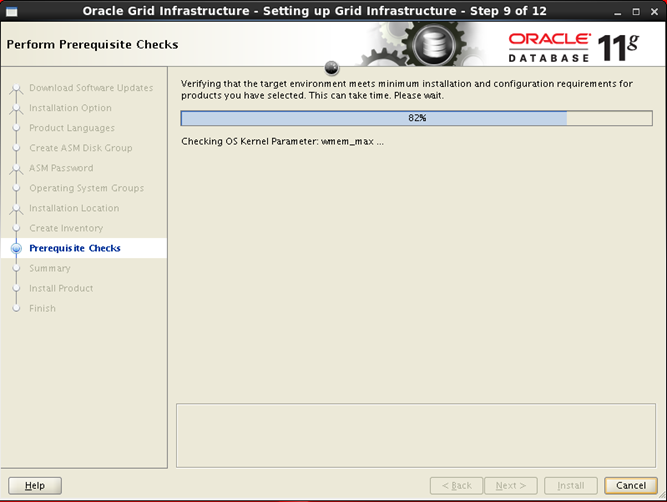
If the installer finds that something is not right with your server, it will tell you to run some fixup scripts. Run them as root until your good

Once ready continue with the installation

During the installation you will prompted to run two scripts a root user, run them to continue

After the installation ends click close to finnish

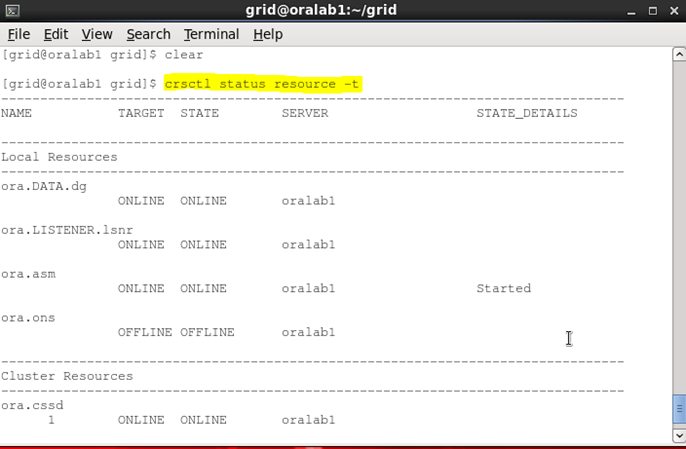
To verify the installation just execute the command “crsctl status resource –t” as grid user
And with sqlplus
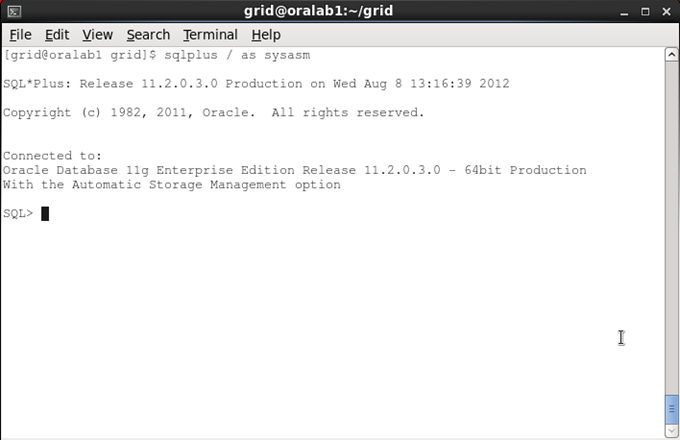
At this point we have our Oracle Restart and ASM in place.
PART III – Installing the Database Software and creating the Database
Now we are going to install the database software as the oracle user. Unzip all the files required as follows
unzip p10404530_112030_Linux-x86-64_1of7.zip
unzip p10404530_112030_Linux-x86-64_2of7.zip
You’ll have a folder called “database” let’s get inside and ejecute the oracle installer with “./runInstaller”

If you have toy Oracle Support credencials put them in place and continue.

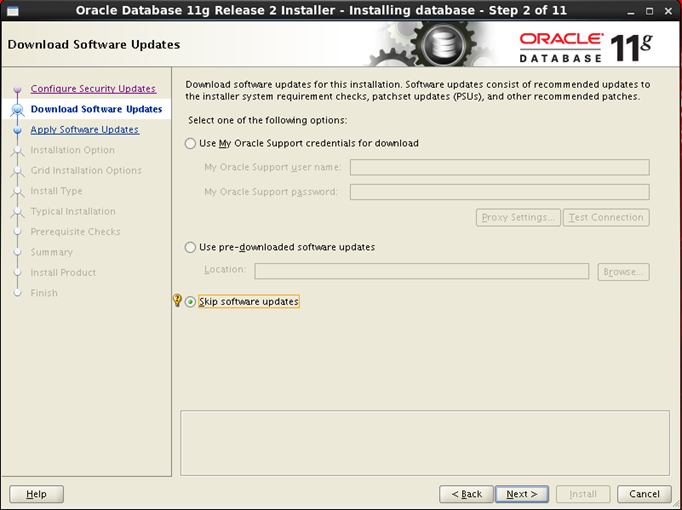
Skip Sofware updates if you want and continue
Select install software only and continue

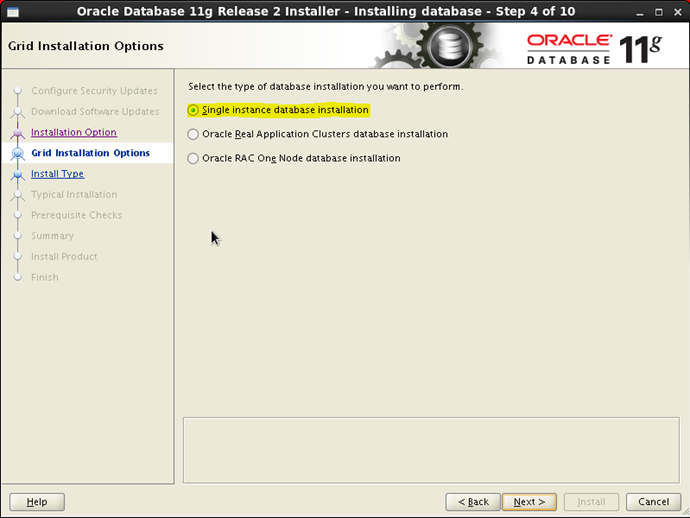
Select Single instance Database installation and continue
Select your language and continue

Select enterprise Edition or the one you prefer and continue

Choose your ORACLE_BASE and ORACLE_HOME

Review your installation and click install to proceed


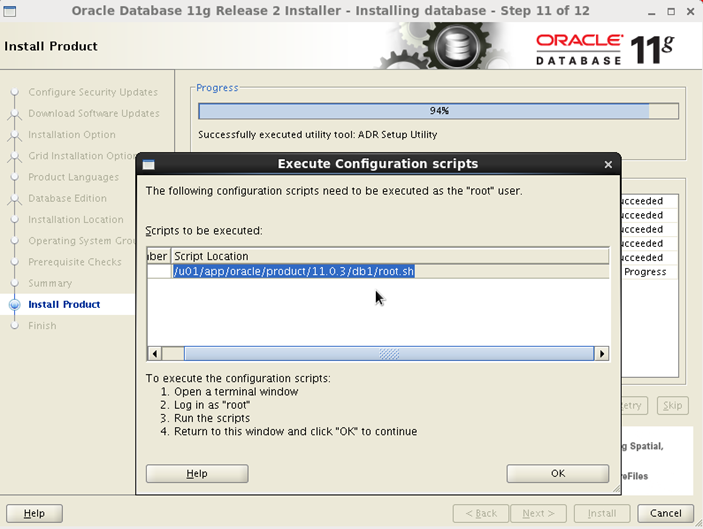
As the installation goes on, you will need to execute a script as the root user
At the end of the installation you will see something like this.

Now let’s create our database with dbca. As the oracle user execute the dbca


Select create a database

Select your template, this time we’re going to select general purpose

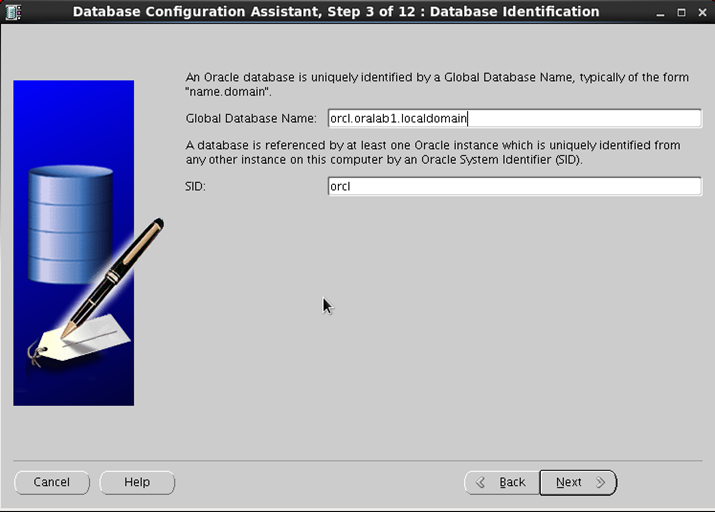
Write your Global database name and sid
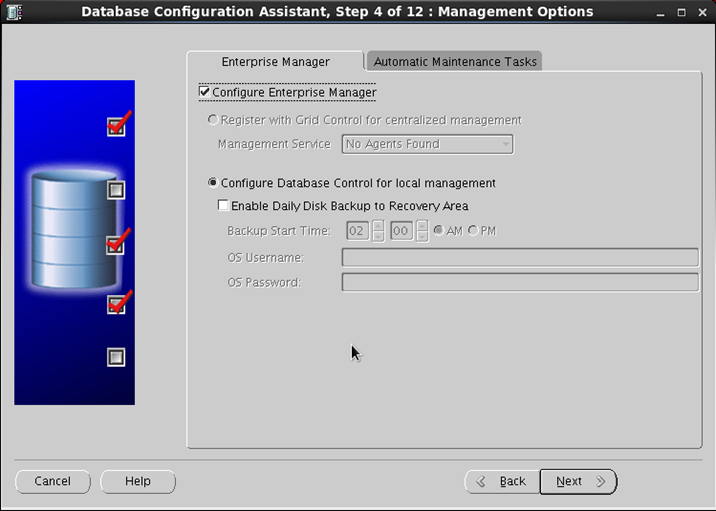
Choose to configure the enterprise manager
Write in the passwords for the administrative users

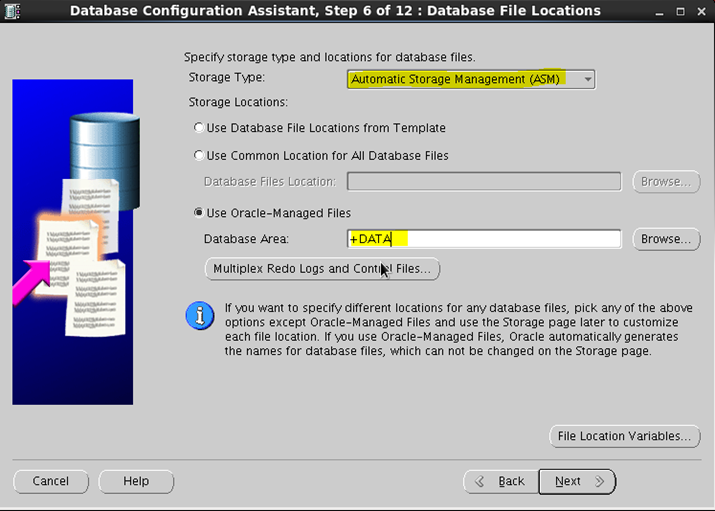
Choose the storage for your database. Select ASM and write the name of your diskgroup.
Specify your asm credentials

Choose to enable or not archiving and the FRA for you database. This time we are not going to set it up. NOT RECOMMENDED IN PRODUCCTION SYSTEM.

Adjust your memory settings as you want or leave the defaults

Next review your database storage. You don’t really need yo modify anything here.

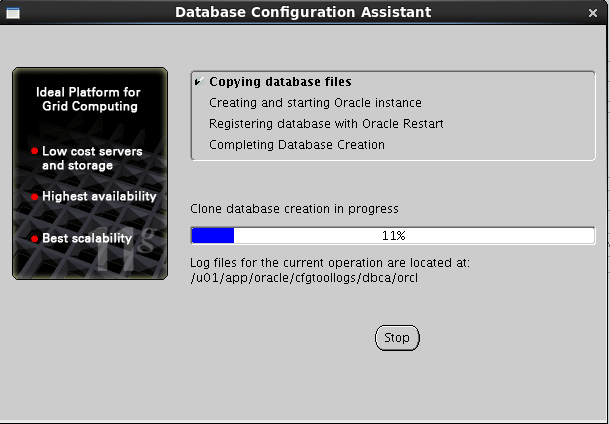
On the summary screen click “OK” to begin the creation of the database

At the end you will see a summary of the database you just created

Let’s verify


Done! We now have a fully functional single database instance using ASM for storage over Oracle Linux 6.
Good Luck!
Emmanuel

Leave a reply to Emmanuel Cancel reply